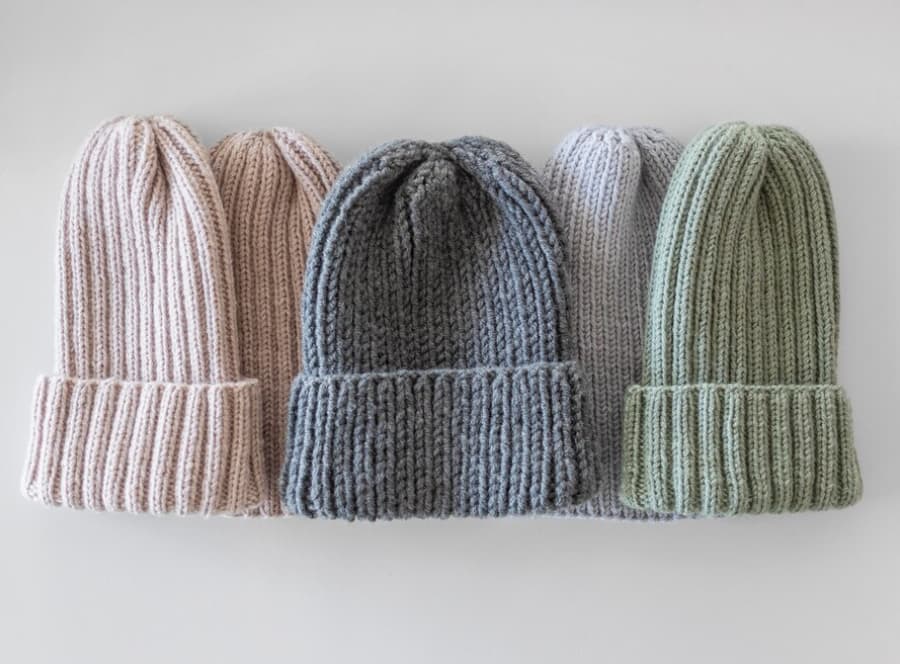
Comprehensive Guide on How to Knit a Hat
In preparation for the upcoming winter season, this tutorial will guide you through the process of knitting a hat using circular needles. You don’t need to worry if you’re a beginner; this project is quite manageable even for those just starting out. We’ll provide a step-by-step breakdown to ensure a comfortable and stylish hat with ribbing for the perfect fit.
This pattern is versatile and can be adapted to any size, whether it’s for men, women, or children. It doesn’t matter if you call it a hat, beanie, or toque; this design works for all. You’ll be knitting it in the round using circular needles, although double-pointed needles are also an option if you prefer. If you’re worried about knitting in the round with circular needles, don’t be. This pattern is beginner-friendly and suitable for those with limited knitting experience. Now, let’s get started with the tutorial.
You may also like our other knitting tutorials and articles, which cover a variety of knitting techniques and projects for all skill levels.
Materials Required for Knitting a Hat
Knitting a hat proves to be a relatively straightforward endeavor, and the necessity for an extensive array of materials is quite minimal. The fundamental knitting essentials deemed essential for beginners include:
- Approximately 300 meters/yards of yarn: For DK weight yarn, a 100-gram skein suffices for most sizes, while fingering yarn requires just about 70 grams. The Tibetan yarn by Pascuali, a blend of yak yarn and merino, is employed in this instance;
- Circular knitting needles corresponding to your yarn’s weight: Opt for 3.5mm to 4.5mm for DK weight and 2.0mm to 2.5mm for fingering. For this tutorial, the Knitter’s Pride Karbonz needles in 3.5mm size are utilized;
- Scissors;
- Sharp tapestry needle;
- Measuring tape;
- Stitch markers;
- Pins for blocking (optional but recommended).
Furthermore, while not obligatory, it is advisable to possess double-pointed knitting needles in the same size. These prove particularly useful for the final few rounds of knitting.
Step 1: Cast-On Stitches for Hat Fit
In the initial stage, the focus lies on ascertaining the precise number of stitches required for the hat to ensure an optimal fit. Pattern downloads often offer size suggestions, but it’s crucial to understand that this necessitates matching the gauge by knitting a swatch. For instance, if the pattern suggests casting on 126 stitches, but using slightly thicker yarn or knitting with a looser tension, the hat may end up excessively large.
Given the necessity of knitting a swatch in both scenarios, it’s advisable to calculate the size yourself—particularly because it involves straightforward arithmetic. This approach provides an opportunity to practice the stitch pattern and gauge compatibility with the chosen yarn.
- Commence by initiating a cast-on using the longtail method, consisting of approximately 26-30 stitches. Proceed to work in a basic 1×1 rib stitch pattern, flat, for about 5 centimeters (equivalent to 2 inches);
- Once the desired length has been achieved, bind off while retaining the yarn for future use. Subsequently, launder the swatch and lay it flat on a soft surface, securing it with pins. Gently stretch the swatch to maintain the crispness of the ribbing, reflecting the desired appearance of the final hat;
- After the swatch has thoroughly dried, employ a tape measure or ruler to ascertain the number of stitches required to cover a 5-centimeter (2-inch) section at the center of the swatch. Take note of this number (for instance, 13 stitches);
- Measure the circumference of the head where the hat will be worn, encompassing the ears and across the forehead. Perform this measurement in front of a mirror to ensure precision and record the measurement (e.g., 57 centimeters);
- Divide the stitch count from step 3 by the length determined in step 4 (e.g., 13 stitches / 5 centimeters = 2.6 stitches per centimeter);
- Multiply the computed ratio by the head’s circumference (e.g., 2.6 stitches per centimeter * 57 centimeters = 148 stitches).
- Round this result down to the nearest multiple of 6 (e.g., 144 stitches).
This final count represents the exact number of stitches needed to cast on for the hat. While these steps may appear numerous, rest assured that the effort invested is worthwhile and will not consume much time. This method ensures that hats fit perfectly, regardless of the desired size.
Step 2: Crafting the Brim

Once the required number of cast-on stitches for the head has been determined, it’s time to commence the actual knitting process. Similar to the swatch, the entire hat will be worked in a 1×1 rib stitch pattern. Let’s now delve into the cast-on technique, aiming for both aesthetic appeal and elasticity. Here are four well-regarded options:
- a) Employ the standard longtail cast-on using two needles. This offers simplicity and is ideal for absolute beginners, although it may result in a slightly tighter edge;
- b) Alternate between the standard longtail cast-on and a cast-on purlwise (also around two needles). This produces an edge that aligns with the knitting pattern, involving a knit stitch followed by a purl stitch in sequence;
- c) Opt for the German Twisted Cast on. This yields a highly elastic edge with a touch of ornamentation. Once again, I recommend alternating between casting on knit and purl stitches;
- d) Explore the tubular cast-on, which is perhaps the most challenging but creates a well-balanced, stretchy edge perfectly suited for a 1×1 rib stitch.
The choice of cast-on method is yours to make, based on your preferences. In this example, a tubular cast-on was employed. However, if you select a different cast-on, it’s advisable to refer to my tutorial on joining knitting in the round, which offers a virtually invisible method (an additional stitch will be needed for casting on). Regardless of your choice:
- Cast on the required number of stitches according to your pattern, using your chosen cast-on method;
- Join in the round; for those using a tubular cast-on, complete the 2 (or 4) setup rows before joining in the round. You can bridge any gaps through grafting later on;
- Work rounds 1 through 30 in a knit 1, purl 1 pattern across all stitches;
- Remember to take periodic breaks while knitting.
Importantly, by this stage, you should have completed the brim of your hat. This presents an ideal opportunity to evaluate the fit and the accuracy of your calculations. It’s advisable not to perform this assessment too early, as ribbing behaves differently after only 5-10 rounds. Additionally, this pattern entails a folded brim, which requires a bit of extra fabric before proceeding.
Fold the brim and position the hat on your head. It should rest comfortably without excessively stretching the ribbing. If you notice that the ribbing appears overly stretched or too compact for your liking, it’s necessary to make the appropriate adjustments.
For an oversized hat, use pins to slightly reduce its size. Then, count the pinned stitches and cast on a reduced number of stitches accordingly, ensuring it remains divisible by 6.
In the case of a hat that’s too small, gently slide it up on your head until it reaches a comfortable fit. Measure the difference, subtract this from the head circumference at the desired position, and calculate the additional stitches required to compensate for this disparity.
Step 3: Crafting the Main Part of the Hat
Once satisfaction with the brim is achieved, knitting can resume. The pattern remains consistent, and you can continue working on the 1×1 ribbing. However, it’s worth noting that you have the option to switch to any other knitting stitch pattern with a similar gauge if desired.
Determining the Appropriate Time to Commence Hat Decreases
While there are no strict rules to adhere to, eventually, you’ll want to initiate the decrease process to shape the crown of the hat. This decision hinges on personal preferences, and I’ll provide three different options as initial guidelines:
- A) To achieve a close-fitting skull cap: Keep knitting until your project, with the brim folded as you prefer, extends just above your usual hairline;
- B) For a pointed hat style: Continue knitting until the hat envelops the crown of your head, with only a small section of hair visible;
- C) Opting for a relaxed, slouchy fit: In instances where a more relaxed and slouchy appearance is desired, knit until your project completely covers the crown of your head.
Given the diversity in head shapes and personal tastes, these are general rules of thumb. Ultimately, if you have a specific vision in mind, you’ll need to adjust these suggestions and create your own pattern. Essentially, this entails completing one full hat and then knitting an improved version or unraveling the part you wish to redo.
In the sample provided, an 8cm brim was knit, and a slightly pointed fit was desired. Consequently, a total of 23 centimeters was knitted before embarking on the decrease phase.
Step 4: Decreasing the Hat
Now, assuming you’ve reached the point where crown shaping is your next objective, you might be wondering about the hat-decreasing process. It’s a fairly comprehensive subject, and one could argue that it’s the primary reason for acquiring a hat pattern in the first place.
Here is the most fundamental version for a ribbed hat. The pattern offers numerous alternatives you may find appealing.
- Round 0: Knit across in the 1×1 rib pattern, then distribute five stitch markers as follows: Divide the total number of stitches into three equal sections. Deduct four stitches from the first section and three stitches from the second section. This should leave you with seven stitches in the middle.
In the example provided, that’s 144/3 = 48.
48 – 4 = 44 & 48 – 3 = 45
Place the first stitch marker after 44 stitches (following a purl stitch). Then, count 7 stitches and add another stitch marker (after a knit stitch). Follow by placing a stitch marker after 45 stitches and a final one after 48 stitches.
Think of this process like cutting a cake into three equal portions, and then someone decides to have a small slice from the front.
Additionally, add a stitch marker to indicate the beginning of the round (attach a bit of yarn to distinguish it).
- Round 1: Knit all stitches as they appear until you’re four stitches before the first marker. SSK, k1, p1, slip marker, knit 7 stitches in pattern, slip marker, p1, k1, k2tog, continue until you’re four stitches before the next marker. SSK, k1, p1, slip marker, k1, k2tog, continue until you’re four stitches before the last marker. SSK, k1, p1, slip marker, k1, k2tog, and finish the round;
- Round 2: Knit all stitches as they appear, paying close attention before and after the markers, where you’ll encounter two adjacent knit stitches. Do not mistakenly continue with k1, p1 there;
- Round 3: Knit all stitches as they appear until you’re three stitches before the first marker. SSK, p1, slip marker, knit 7 stitches in pattern, slip marker, p1, k2tog, continue until you’re three stitches before the next marker. SSK, p1, slip marker, k2tog, continue until you’re three stitches before the last marker. SSK, p1, slip marker, k2tog, and finish the round;
- Round 4: k1, p1;
- Round 5: Repeat rounds 1-4 until only a third of the stitches remain (e.g., 48 stitches), then decrease in every row. Skip rounds 2 and 4 from the previous instructions.
Halt the decreasing process when only 18 stitches remain.
In the final round, there will be only 2 stitches before and after the markers. SSK/K2tog these stitches respectively.
Tip: Consider switching to double-pointed knitting needles slightly higher up. Many knitters find it more manageable to handle those last rounds compared to using the magic loop method.
Step 5: Completing the Hat

- To finish the hat, begin by cutting the yarn, leaving a tail of approximately 10 inches. Thread this tail onto a tapestry needle and pass it through each remaining stitch on the needles. As you do so, remove the needles, pull the thread tight, and secure it with a final stitch;
- Next, weave in the tails on the wrong side of your work. For ribbed patterns, use a sharp tapestry needle and follow a column of knit stitches for 5-8 rows before threading the tail back in the opposite direction. Make sure to gently stretch out your knitting before trimming the tails;
- If you employed a tubular cast-on, utilize the cast-on tail to graft one stitch, bridging any gaps;
- You might want to consider blocking your hat, although it’s not always necessary. Due to the natural tendency of 1×1 ribbing to contract, the tip of your hat may resemble stockinette stitch;
- To block, gently wash your completed hat in lukewarm water, allowing it to soak for approximately 30 minutes. Then, carefully pat it dry between two towels and pin it to a soft surface without overstretching it. Allow it to air dry overnight.
Depending on your personal style preferences, you may choose to attach a pom-pom. You can craft one using the same yarn or a contrasting yarn, or purchase one on Etsy. Fake fur pom-poms can also provide an appealing option.
Conclusion
Learning how to knit a hat can be a straightforward and rewarding process for both beginners and experienced knitters. The process outlined in this guide provides a fundamental understanding that can be built upon to create more intricate and intricate designs. With a bit of time and patience, you could fill your wardrobe with warm, stylish, self-made hats.
